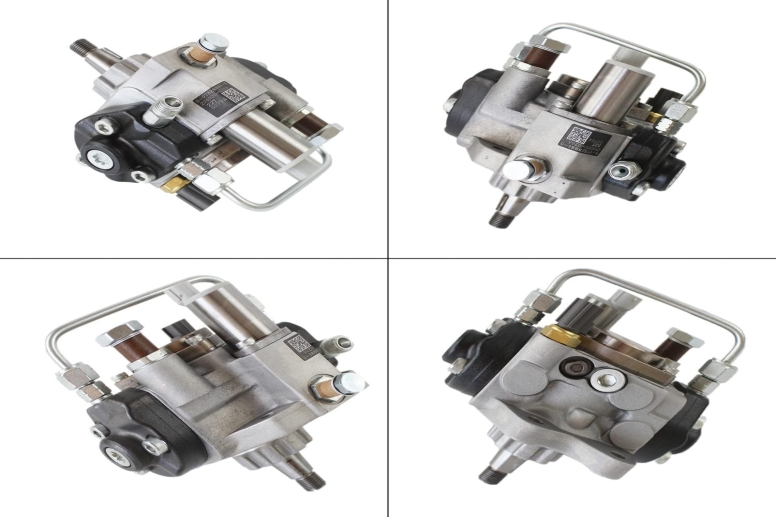
How to rebuild a high-quality diesel pump ?
Professional Diesel Fuel Injection Pump Rebuild: Detailed Guide & Precautions
I. Preliminary Assessment & Preparation
A. Pre-Disassembly Evaluation
Documentation & History
Record pump model, serial number, and vehicle information
Note customer complaints and symptoms
Document hours/mileage and service history
Initial Testing (if possible)
Check delivery rate on test bench
Measure camshaft end play
Test governor operation
Check for external leaks and damage
B. Workspace & Tools
Clean Room Environment
ISO Class 8 (100,000) or cleaner recommended
Positive air pressure, temperature controlled (20-25°C/68-77°F)
Separate dirty/clean areas with physical separation
Specialized Equipment Required
Injection pump test bench with appropriate adapters
Micrometers (0-25mm, 25-50mm, 50-75mm)
Dial indicators and magnetic bases
Torque wrenches (inch-lb and ft-lb)
Bearing pullers and installers
Ultrasonic cleaning tank
Precision measuring pins and surface plates
II. Disassembly Procedure
A. External Cleaning
Remove gross contaminants with safety solvent
Use appropriate cleaning solutions (avoid caustic on aluminum)
Dry thoroughly before disassembly
B. Systematic Disassembly
Documentation Phase
Photograph each stage before disassembly
Use segmented trays with labeled compartments
Create exploded view diagram
Critical Disassembly Order
Remove external components (fuel lines, solenoids, sensors)
Extract delivery valves with proper tools
Remove camshaft assembly (note thrust washer orientation)
Extract plungers and barrels as matched pairs
Remove governor components
Extract advance mechanism (if equipped)
III. Component Inspection & Measurement
A. Precision Component Evaluation
Plunger & Barrel Assembly
Measure clearance: typically 0.0008-0.0015mm (0.00003-0.00006")
Check for scoring, pitting, or discoloration
Perform leak-down test at various plunger positions
Delivery Valves
Measure valve-to-seat clearance
Check spring tension and length
Inspect seat surface for pitting
Camshaft & Roller Tappets
Measure cam lobe height (wear limit typically 0.05mm)
Check shaft diameter and bearing surfaces
Inspect tappet rollers for flat spots
Housing Inspection
Check for cracks, porosity, or thread damage
Measure bearing bore diameters
Verify sealing surface condition
B. Wear Limits Documentation
Record all measurements vs. manufacturer specifications
Flag components approaching wear limits
Determine replacement vs. reusability
IV. Cleaning Process
A. Ultrasonic Cleaning
Primary Cleaning
Use heated alkaline solution for steel components
Use mild pH-neutral solution for aluminum
Cycle time: 15-30 minutes at 50-60°C (122-140°F)
Rinsing & Drying
Multiple distilled water rinses
Use hot air drying (max 80°C/176°F)
Immediate application of rust preventive
B. Critical Cleaning Notes
Never mix aluminum and steel parts in same cleaning cycle
Protect calibrated orifices from cleaning solution residue
Ensure complete removal of cleaning agents
V. Reassembly Procedure
A. Preparation
Organize all replacement parts and seals
Verify calibration data sheet is available
Prepare assembly lubricant (specified oil or special grease)
B. Critical Assembly Steps
Housing Preparation
Install new bearings with proper tools (no hammering)
Verify bearing preload
Install new seals with appropriate sealant if required
Plunger & Barrel Installation
Install as matched pairs only
Use assembly sleeves to prevent damage
Verify free rotation before tightening
Camshaft Installation
Check end play (typically 0.03-0.08mm)
Verify proper thrust washer orientation
Ensure smooth rotation
Governor Assembly
Install with manufacturer-specified springs
Verify weights move freely
Check lever clearances
Sealing
Use only manufacturer-specified seals
Apply sealants per technical bulletins
Install new O-rings (never reuse)
C. Torque Specifications
Always use manufacturer torque values
Use thread locker where specified
Follow tightening sequences (especially on multi-bolt flanges)
VI. Calibration & Testing
A. Test Bench Setup
Preparation
Verify test fluid is to specification (ISO 4113 or equivalent)
Calibrate test bench before use
Use appropriate adapters and drives
Initial Testing
Check for leaks at low pressure
Verify smooth operation through full RPM range
Check advance mechanism operation (if equipped)
B. Calibration Procedure
Delivery Quantity Setting
Set at manufacturer-specified RPM and rack position
Adjust using calibration screws
Verify at multiple rack positions
Governor Calibration
Set start of injection
Adjust maximum speed
Verify idle stability
Advance Curve Verification (if applicable)
Check at multiple RPM points
Verify smooth advance progression
C. Final Verification
Run complete operational cycle
Check for leaks under pressure
Verify all control functions
Print calibration report
VII. Post-Rebuild Procedures
A. Documentation
Complete rebuild worksheet with all measurements
Record replacement parts with lot numbers
Attach calibration report
Provide warranty information
B. Preservation & Packaging
Apply rust preventive to external surfaces
Seal all openings with appropriate caps
Use anti-static packaging for electronic components
Include installation instructions
VIII. Critical Precautions & Professional Standards
A. Safety Precautions
Personal Safety
Use eye protection at all times
Wear nitrile gloves (fuel-resistant)
Use proper ventilation when cleaning
Component Safety
Never handle plungers with bare hands (skin acids cause corrosion)
Keep components in sealed containers when not in use
Use brass tools on aluminum housings
B. Quality Control Points
Contamination Control
Work in laminar flow bench when possible
Use filtered air for drying
Implement 5S methodology (Sort, Set, Shine, Standardize, Sustain)
Measurement Validation
Calibrate measuring instruments weekly
Have critical measurements verified by second technician
Maintain measurement uncertainty records
C. Common Failure Points to Avoid
Installation Errors
Incorrect shimming of bearings
Over-tightening of mounting flange
Incorrect timing mark alignment
Calibration Mistakes
Using wrong test fluid viscosity
Incorrect test bench setup
Not allowing for temperature stabilization
Material Compatibility Issues
Using incompatible sealants
Mixing lubricants
Using non-specified replacement parts
D. Professional Standards
Always follow manufacturer technical bulletins
Maintain traceability of all components
Participate in continuing technical education
Update calibration equipment regularly
Maintain detailed customer records
IX. Special Considerations by Pump Type
A. Rotary Pumps (VE, etc.)
Pay special attention to pressure regulator
Check distributor head for scoring
Verify vane pump operation
B. Inline Pumps (A, P, MW, etc.)
Check camshaft alignment
Verify individual element timing
Pay attention to fuel inlet conditions
C. Unit Injector Systems
Special handling for piezoelectric components
Ultra-high pressure considerations
Electronic calibration requirements
X. Continuous Improvement
Failure Analysis
Document root causes of failures
Update procedures based on findings
Share knowledge with technical community
Tooling Investment
Invest in specialized tools for new systems
Update test equipment as technology advances
Maintain tool calibration registry
This comprehensive approach ensures professional-grade diesel pump rebuilding that meets or exceeds OEM standards, providing reliable performance and longevity in service.
