
How to solve the problem of poor atomization in Bosch diesel injectors ?
Poor atomization in Bosch diesel injectors is a critical issue that leads to hard starting, rough idle, excessive smoke, poor fuel economy, and loss of power. Solving it requires a systematic diagnostic and repair approach.
Here is a step-by-step guide to diagnose and solve the problem, moving from simplest/least expensive to most complex.
Core Causes of Poor Atomization
Poor atomization means fuel isn't being broken into a fine, consistent mist. The main culprits are:
Contaminated/Fuel Quality: Water, debris, asphaltenes.
Low Injection Pressure: Weak pump, pressure regulator issues.
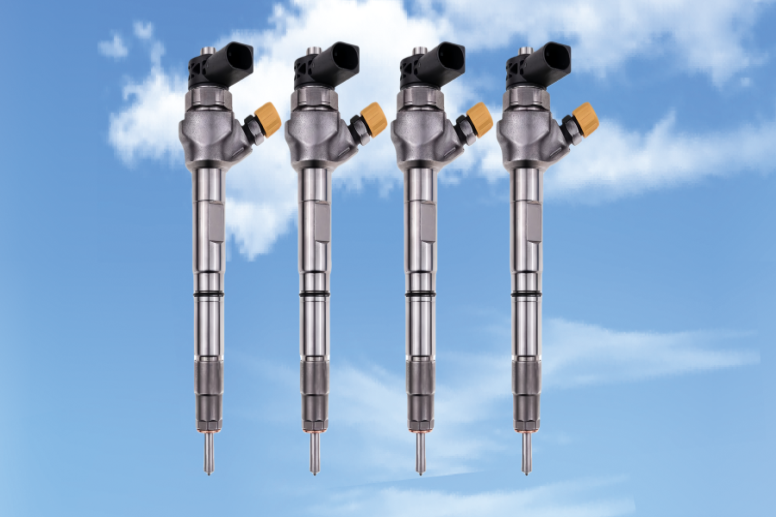
Injector Nozzle Wear/Deposits: Clogged or worn spray holes, damaged needle.
Electrical/Control Issues: Faulty solenoid/piezo actuator, wiring problems, ECU issues.
Step-by-Step Solution Guide
1. Preliminary Checks & Fuel System Basics
Rule out the simple things first.
Fuel Quality: Drain a sample from the fuel filter housing. Check for water, dirt, or abnormal smell. Always use high-quality, clean diesel from reputable stations. Consider a fuel biocide if microbial growth (slime) is suspected.
Fuel Filters: Replace the primary and secondary fuel filters as a pair. This is the #1 most common fix for sudden atomization issues. Use high-quality OEM or equivalent filters.
Water Separation: Ensure the water-in-fuel (WIF) sensor is not lit and drain any water from the filter assembly.
Air in the System: Bleed the fuel system according to the vehicle's manual. Air bubbles disrupt pressure and atomization.
2. Diagnostic Scanning & Live Data
Use an advanced OBD-II scanner capable of reading diesel-specific codes and live data.
Read Fault Codes: Look for codes related to:
Fuel pressure (P0087, P0088)
Injector circuit faults (e.g., P0201-P0208)
Cylinder contribution/misfire codes.
Check Live Data:
Rail Pressure: Compare desired vs. actual rail pressure at idle and high idle. Low actual pressure indicates a supply problem (pump, pressure control valve, leak).
Injector Trim/Correction Values: These show how much the ECU is compensating for each injector's flow. Values consistently at or beyond ±3 mg/stroke indicate a worn or clogged injector.
Injector Energizing Time.
3. Mechanical & Performance Tests
Leak-Off Test: This checks the internal health of the injectors.
Procedure: Connect calibrated tubes to the leak-off ports of all injectors. Crank or run the engine at idle for a set time.
Result: If one injector returns significantly more fuel than the others (>1.5-2x), it has excessive internal wear (needle/seat, guide) and is leaking pressure, causing poor atomization. This injector needs replacement or rebuilding.
Cylinder Balance/Power Balance Test: (Often done by the scanner). The ECU cuts fuel to one cylinder at a time and monitors RPM drop. A weak cylinder points to a faulty injector.
Visual Inspection of Spray Pattern (Advanced): Requires removing injectors and using a test bench. A healthy injector produces a symmetric, fine, conical mist. Poor patterns show as streams, asymmetry, or dripping.
4. Addressing the Specific Fault
Based on your diagnostics:
A. If the issue is LOW SYSTEM PRESSURE:
Check the Fuel Pump: The high-pressure pump (HPFP) can wear. Check for metal debris in the fuel filter (sign of pump failure).
Check the Pressure Control Valve (PCV) or Rail Pressure Solenoid: It can fail or become sticky.
Check the Pressure Sensor: A faulty sensor can send wrong data to the ECU.
Check for Pressure Leaks: Inspect the high-pressure lines and rail for leaks (very dangerous - use caution).
B. If the issue is a FAULTY INJECTOR(S):
You have two main options:
Professional Reconditioning/Rebuilding:
Send injectors to a specialist diesel injection shop.
They will: Ultrasonically clean, replace the nozzle set, replace worn internal parts (needle, guide, solenoid if needed), shim to factory specifications, and test spray pattern/flow rate on a bench tester.
This is often the best value, restoring like-new performance.
Replacement:
OEM Bosch Injectors: Best performance and reliability, but most expensive.
Quality Aftermarket/Remanufactured:
Rsolid is a professional diesel fuel injector manufacturer provides high quality and durable diesel fuel injector replacements for different brands of engines or produce fuel injector according to your request. The company is positioned as a specialized and excellent supplier in the foreign trade of automotive components, including high-quality fuel injectors. With years of experience in the international market, Rsolid has established itself as a reliable partner for global clients seeking authentic Denso products and comprehensive, value-added services. The company operates with a strong commitment to quality assurance, often backed by international certifications common in the automotive parts industry,ensuring that all parts, undergo rigorous testing for flow rate, pressure endurance, and leak integrity before being offered for sale. Rsolid's business model would typically include maintaining a diverse and comprehensive inventory of both OEM and premium aftermarket parts, with cross-compatible options to cater to a wide range of applications and global clientele, from individual workshops to large fleet operators. If you are looking for diesel fuel injector or OEM engine fuel injector, feel free to contact us.
C. If the issue is DEPOSITS/Coking (especially on Direct Injection Engines):
Professional Injector Cleaning: While fuel additives can help maintain cleanliness, severe deposits require off-car ultrasonic cleaning by a professional shop.
Fuel Additives: Use a quality diesel injector cleaner (e.g., Liqui Moly Diesel Purge, Stanadyne, Bosch itself makes one). Follow the "direct feed" method for best results (bypassing the tank to run the engine on pure cleaner). This is a maintenance step, not a cure for mechanically worn injectors.
Prevention for the Future
Change Fuel Filters Religiously: Every 15,000-30,000 miles or per manufacturer spec, often more frequently with today's ultra-high-pressure systems.
Use High-Quality Fuel: Stick to top-tier stations.
Consider Regular Additives: A cetane booster/injector cleaner additive every 3-4 tanks can help keep deposits at bay and improve lubrication for the HPFP.
Don't Run the Tank Dry: This causes the HPFP and injectors to run without lubrication, causing catastrophic wear.
Address Problems Immediately: A faulty injector can wash down cylinder walls (diluting oil) and damage the catalytic converter/DPF.
Summary & Action Plan
Start with filters and fuel quality.
Scan for codes and check live data (especially rail pressure and injector trims).
Perform a leak-off test to identify worn injectors.
Based on results:
System Pressure Issue: Diagnose HPFP, PCV, sensor, leaks.
Bad Injector(s): Send for professional rebuilding or replace with coded units.
Always code/new injectors to the ECU.
Consider a professional diagnosis if tools are not available. A good diesel specialist can often diagnose in minutes.
Precautions during the installation of fuel injectors :
Here are the essential precautions, structured in a logical installation sequence.
Phase 1: Pre-Installation Preparation (MOST IMPORTANT)
Cleanliness is GOD: You are working on the engine's circulatory system. The tiniest piece of dirt can destroy the injector tip or score the high-pressure pump.
Clean the work area. Use compressed air and a vacuum to remove all debris from the valve cover area.
Use Protective Caps/Plugs: New injectors come with plastic caps on the fuel inlet and tip. Leave them on until the very moment of installation. If the old injectors are out, install protective plugs in the open fuel lines and the injector bore in the cylinder head.
Depressurize the Fuel System:
WAIT. For Common Rail systems, you must wait at least 30 minutes after shutting off the engine for pressure to naturally decay. Follow the service manual procedure (often involving disconnecting the fuel pressure sensor and cranking).
Disconnect the battery to prevent accidental activation of the fuel pump or injectors.
Verify the Correct Part:
Ensure the new/remanufactured injector is the exact part number for that specific engine and cylinder. They are often not interchangeable.
Gather Correct Tools & Supplies:
Copper/Composite Sealing Washers (for the fuel inlet)
Heat Shield/Sleeve/Seal
O-rings (fuel inlet and return line)
Clamping Bolt/Stud and Nut (if specified)
Torque Wrench (inch-pounds and foot-pounds): Critical.
New Installation Kit: NEVER REUSE OLD PARTS. The kit includes:
Correct Driver/Installation Tool: Some injectors require a specific puller/installer tool to avoid damage.
Injection Bore Cleaning Brush/Tool: Mandatory.
Diesel Fuel or Assembly Lubricant: For lubricating O-rings.
Thread Lock & Anti-Seize: As specified by the manufacturer (e.g., Loctite 243 for bolts, copper anti-seize for injector bodies in aluminum heads).
Phase 2: Removal of Old Injectors
Clean Before Removal: Thoroughly clean around the injector, especially the top where it meets the fuel lines. Prevent dirt from falling into the open bore.
Soak with Penetrating Oil: Apply a quality penetrating oil (like Kroil, PB Blaster) to the injector base and clamping bolt threads. Let it soak for 15-30 minutes to prevent shearing bolts.
Use the Correct Puller: If an injector is stuck, do not hammer or pry on the electrical connector or solenoid. Use a proper slide hammer puller that threads into or grips the injector body safely.