



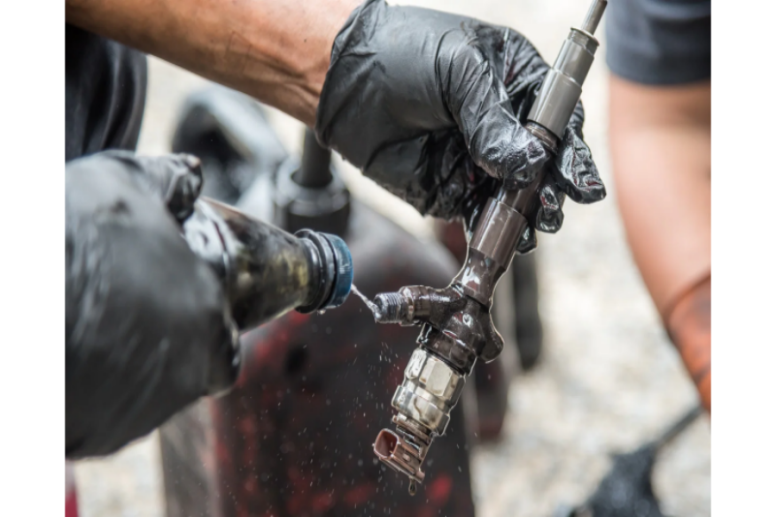
DIY Guide for Replacing Gaskets and Cleaning Carbon Deposits in Diesel Injectors
DIY Guide for Replacing Gaskets and Cleaning Carbon Deposits in Diesel Injectors – Restore Power & Stop Leaks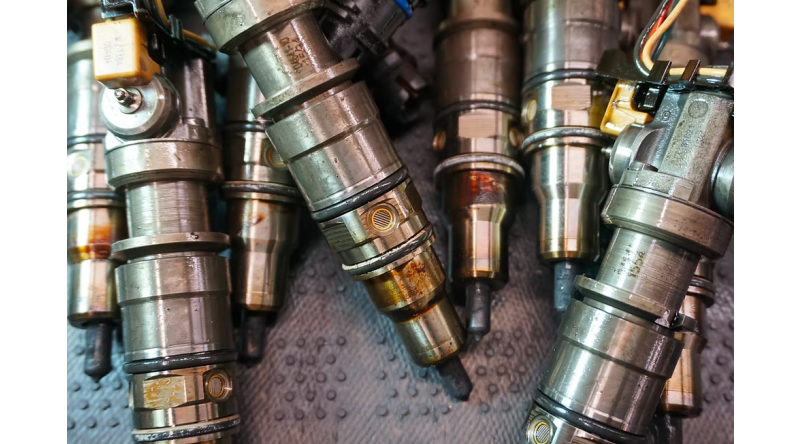
Meta Description: Step-by-step DIY tutorial for replacing worn injector gaskets and removing stubborn carbon deposits. Save $200+ in shop fees and fix rough idle, black smoke, and fuel leaks today.
Introduction – The Two Silent Killers of Diesel Performance
Most diesel owners obsess over fuel filters and oil changes but ignore two critical maintenance tasks: worn gaskets (seals) and carbon buildup on injector nozzles.
Failed gaskets (especially copper crush washers and O-rings) allow high-pressure combustion gases to leak past the injector. This causes a telltale "chuffing" sound, loss of compression, hard starting, and even fire risk if diesel soaks into the engine bay.
Carbon deposits form when low-quality fuel or frequent short trips leave unburned residues on the nozzle tip. These hard, crusty layers distort the spray pattern, turning a fine mist into uneven jets that cause black smoke, knocking, and 10–15% higher fuel consumption.
A dealership will easily charge $300–$600 for this combined job. With basic hand tools, a weekend afternoon, and about $60 in parts, you can do it yourself – and achieve professional-grade results.
This guide covers both the gasket replacement and the carbon removal process in a single, integrated workflow.
Safety & Preparation – Read This First
⚠️ Diesel fuel is flammable and carcinogenic. Work outdoors or in a cross-ventilated garage. Wear nitrile gloves, splash-proof goggles, and a P100 respirator with organic vapor cartridges.
🔥 Keep a Class B fire extinguisher within arm’s reach.
🔌 Disconnect the negative battery terminal before starting any removal.
📖 Always keep your vehicle’s factory service manual nearby – torque values vary widely between engine models.
Tools & Consumables Checklist
| Category | Item |
|---|---|
| Removal | Injector puller / slide hammer, deep sockets, wobble extensions |
| Gasket Kit | New copper crush washers (OEM spec), new O-rings for return lines, new hold-down bolts (if torque-to-yield) |
| Carbon Cleaning | Diesel injector nozzle cleaning spray (PEA-based), brass brush, fine picks, ultrasonic cleaner (optional but ideal), clean diesel for rinsing |
| Seat Cleaning | Copper seat reamer tool (specific to your cylinder head) or a wooden dowel with fine emery cloth |
| Installation | Torque wrench (accuracy ±3%), anti-seize compound (for hold-down threads), clean engine oil |
| Miscellaneous | Shop towels, brake cleaner (non-chlorinated), compressed air, magnifying glass or jeweler's loupe |
Step-by-Step Procedure
Step 1 – Relieve Fuel Pressure and Remove Injectors
Unplug the fuel pump relay or fuse, then crank the engine for 5–10 seconds to drop rail pressure (refer to your manual).
Thoroughly clean the area around each injector with brake cleaner and compressed air. Any dirt that falls into the cylinder head bore will destroy your new seals.
Disconnect the high-pressure fuel lines, return hoses, and electrical connectors. Cap all open ports with clean plastic plugs.
Remove the hold-down clamps or bolts. Note their order and orientation.
Attach the injector puller and gently extract each injector straight upward. Never twist or pry – you can deform the nozzle body.
Label each injector with its cylinder number (e.g., #1, #2). They must return to their original holes.
Step 2 – Initial Inspection & External Carbon Removal
Place each injector on a clean cloth. Inspect the nozzle tip with a magnifying glass.
Using a brass brush (never steel – steel scratches the precision holes), gently scrub the external carbon crust from the nozzle body and the lower sealing shoulder.
Spray brake cleaner over the tip and wipe with a lint-free towel. Do not poke the nozzle holes with hard wire – if you enlarge them even by 0.01 mm, the spray pattern is ruined.
Step 3 – Deep Carbon Deposit Cleaning (The Core Process)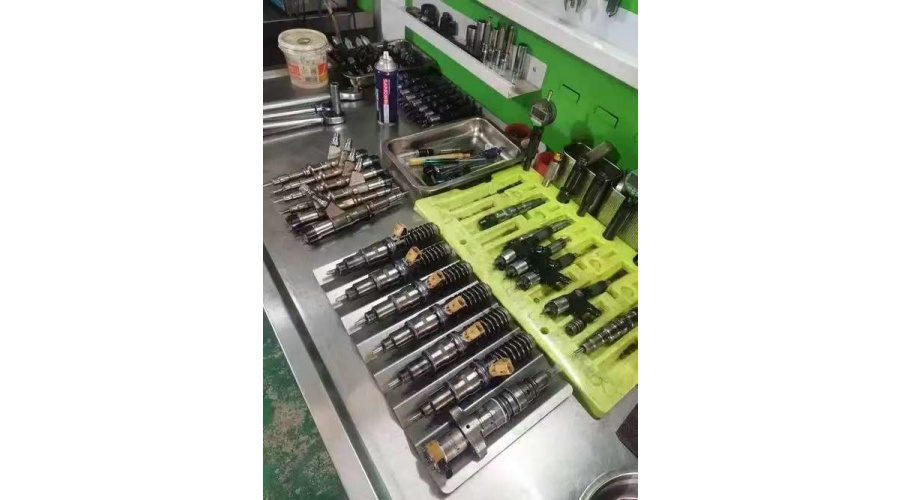
This step targets the hard, baked-on carbon inside the nozzle sac and around the needle valve.
Option A – Ultrasonic Cleaning (Recommended)
Fill your ultrasonic cleaner with a solvent-based diesel injector cleaning solution (never water-based).
Heat the bath to 50–60°C (122–140°F).
Suspend the injectors nozzle-down in the basket. Run for 3 cycles of 15 minutes each, changing the solution after the second cycle.
Between cycles, use a soft wooden toothpick to gently dislodge any visible carbon flakes around the orifice plate – but only if you have a steady hand.
Option B – Manual Soaking (If you don’t have an ultrasonic)
Soak the nozzle ends in a PEA-intensive carbon remover (like Liqui Moly Diesel Purge) for 12–24 hours.
After soaking, use a brass brush and the cleaning solution to work away softened carbon. Repeat 2–3 times.
For stubborn deposits, attach a piece of vacuum hose to the injector inlet and suck clean diesel through the nozzle while manually tapping the body with a plastic mallet – this helps flush dislodged particles out.
Final rinse: Flush each injector with clean diesel fuel, then blow dry with compressed air (max 30 psi). Let them air-dry for 20 minutes.
Step 4 – Removing Old Gaskets & Cleaning the Cylinder Head Seat
This is the most critical step for a leak-free reinstallation.
Remove the old copper washer from the injector nozzle – it usually slides off. If stuck, gently split it with a pick.
Now focus on the cylinder head recess: Use a copper seat reamer (matched to your engine) or a wooden dowel wrapped with 400-grit emery cloth to clean the sealing surface inside the head bore.
Rotate it by hand 5–6 times to remove baked-on carbon and old copper residue.
Critical rule: Never use a steel scraper directly on the aluminum head – you will gouge the surface, causing permanent leakage.
Vacuum or blow out any debris from the recess. The surface should appear shiny and smooth.
Clean the injector’s lower sealing cone with brake cleaner – it must be perfectly free of oil and grit.
Step 5 – Installing NEW Gaskets (Copper & O-Rings)
Take your new copper crush washer and (if specified by the manual) anneal it by heating it to a dull red glow with a propane torch, then quenching in water – but only if the OEM recommends this; most modern washers are pre-annealed and ready to use.
Slide the new copper washer onto the injector nozzle. Ensure it sits flush against the shoulder.
Lubricate new O-rings (for fuel return lines) with a tiny smear of clean diesel or silicone grease – never use petroleum grease on O-rings.
Install O-rings in their grooves.
Pro tip: Always replace the hold-down bolts if they are torque-to-yield (stretch bolts). Reusing them can under-clamp the injector, leading to immediate blow-by.
Step 6 – Reinstall Injectors with Correct Torque
Carefully insert each injector into its original cylinder. Align the orientation mark (notch or flat) per your service manual – misalignment blocks the return fuel port.
Place the hold-down clamp and finger-tighten the bolt.
Using your torque wrench, tighten in two stages:
Stage 1: 10–15 Nm (to seat the copper washer)
Stage 2: Final torque – commonly 45–55 Nm for many 4-cylinder diesels, but always check your manual. Over-torquing distorts the injector body; under-torquing leaks combustion gases.
Reconnect high-pressure lines (use new line gaskets if required), return hoses, and electrical plugs.
Step 7 – Priming, Starting & Leak Testing
Reconnect the battery.
Turn the ignition to "ON" for 30 seconds (without cranking) to prime the system – repeat 4–5 times.
Crank the engine. It may take 5–10 seconds to fire – this is normal as air bleeds out.
Once running, let it idle for 2 minutes. Immediately check the base of each injector for diesel seepage or bubbling (combustion leaks).
If you see bubbles or smell fuel, shut off immediately and re-torque the hold-down bolt by an extra 5 Nm. If it still leaks, the copper seat wasn't fully cleaned – you must redo Step 4.
Take a test drive. Monitor for smoke, smooth idle, and throttle response.
Post-Job Verification
Compression feel: The engine should start faster and idle without the typical "nailing" sound.
Fuel economy: Track the next two fill-ups – you should see a noticeable gain.
Smoke: Black smoke under hard acceleration should be greatly reduced or gone.
5 Common Mistakes That Ruin the Job
| Mistake | Consequence |
|---|---|
| Skipping the cylinder head recess cleaning | New copper washer won’t seal – leaks immediately |
| Using steel tools on the nozzle holes | Permanent spray pattern damage – injector must be replaced |
| Reusing old hold-down bolts (stretch type) | Insufficient clamp load – gasket fails within 100 miles |
| Over-tightening the hold-down bolt | Bent injector body, sticking plunger, or cracked nozzle |
| Forgetting to label injectors | Mismatched trim codes (on common-rail) cause cylinder imbalance and DTC errors |
When to Stop DIY and Call a Pro
You see pitting or erosion on the nozzle tip – carbon cleaning won't fix metal loss.
The injector fails a leak-off (return flow) test – indicates worn internal valve components.
You drop an injector on the floor – even a tiny impact can misalign the needle.
In these cases, send the set to a diesel injection shop for flow-bench calibration or replacement.
Conclusion – A Saturday Well Spent
Replacing gaskets and cleaning carbon deposits is one of the highest-ROI DIY jobs you can perform on a diesel engine. For less than the cost of a single shop hour, you restore compression sealing, optimize fuel atomization, and protect your engine from long-term damage caused by combustion gas blow-by and lean/rich running conditions.
Patience and cleanliness are your best tools. Follow every step, never skip the torque wrench, and your diesel will reward you with quieter operation, better mileage, and thousands of extra miles of reliable service.